Painting Garage Floor: The Complete Guide
Have you ever walked into your garage and felt frustrated by a patchy, stained concrete floor? A freshly painted garage floor can transform that space — improve aesthetics, reduce dust, simplify cleaning, and protect the concrete beneath. In this guide, we’ll walk you through everything you need to know to painting garage floor the right way, whether you’re doing it yourself or hiring a pro.
Why Paint a Garage Floor? Key Benefits & Considerations
Painting the garage floor has more than cosmetic value. Here’s why many Melbourne homeowners invest in it:
- Seals and protects concrete from moisture, oil stains, and chemical damage
- Reduces concrete dust and improves air quality in attached garages
- Makes cleaning easier — spills wipe clean, dirt doesn’t stick
- Improves property value — a finished garage suggests care and utility
- Customisable appearance — colour, flake systems, gloss or matte finishes
- Non-slip / safety options — with textured coatings, you can maintain grip
However — not all coatings are equal. To get a lasting result, proper preparation, material choice, and application techniques matter enormously.
Choosing the Right Coating for Your Garage Floor
Before you start, it’s important to know which coating suits your garage floor best. Here are the main options used in Australia:
1. Epoxy
- Extremely durable, chemical and stain resistant
- Best for high-traffic garages and workshops
- Can yellow under UV unless topcoated
- Longer curing times compared to other coatings
2. Acrylic / Concrete Floor Paint
- More affordable and easy to apply
- Dries quickly and suits light-use garages
- Less durable under heavy vehicle loads
- Prone to wear and peeling over time
3. Polyurethane
- Excellent UV stability and scratch resistance
- Often used as a topcoat over epoxy
- Great choice for garages with skylights or strong sunlight
- Costs more than standard floor paints
4. Polyaspartic / Polyurea
- Premium option with very fast curing
- Extremely durable and chemical resistant
- Ideal for commercial garages or when downtime must be minimal
- Requires professional application and is more expensive
Step-by-Step Process for Painting Garage Floor
Below is a professional-level workflow that AH Painting uses. If you follow it (or better yet, let us do it), you can expect a durable finish that lasts.
1. Initial Assessment & Moisture Check
- Perform a moisture test (e.g. tape a 1 m² plastic sheet to the concrete for 24 hrs — if condensation forms, moisture is present).
- Inspect for cracks, spalling, old coatings, or contamination (oil, grease, salts).
2. Thorough Cleaning & Degreasing
- Sweep and remove all debris.
- Apply a concrete degreaser / detergent; scrub oily patches with acid etch or degreaser.
- Use pressure washing to flush residues.
- Let concrete fully dry (24–48 hrs or longer depending on humidity).
3. Surface Profiling (Etching / Grinding)
- If the concrete is too smooth (or if a sealer was previously applied), you’ll need to etch or diamond grind to open the pores. This helps coatings bond.
- After etching, wash and neutralise, then let dry completely.
4. Repair Cracks, Joints & Imperfections
- Fill cracks with a flexible epoxy floor filler or polymer-modified repair mortar.
- Seal the joints and edges with appropriate caulk.
- Sand lightly after curing to ensure smoothness.
5. Primer / Base Coat Application (if required)
- Some epoxy systems require a primer or base coat to improve bonding and reduce pinholes.
- Apply with roller or squeegee, following manufacturer specs.
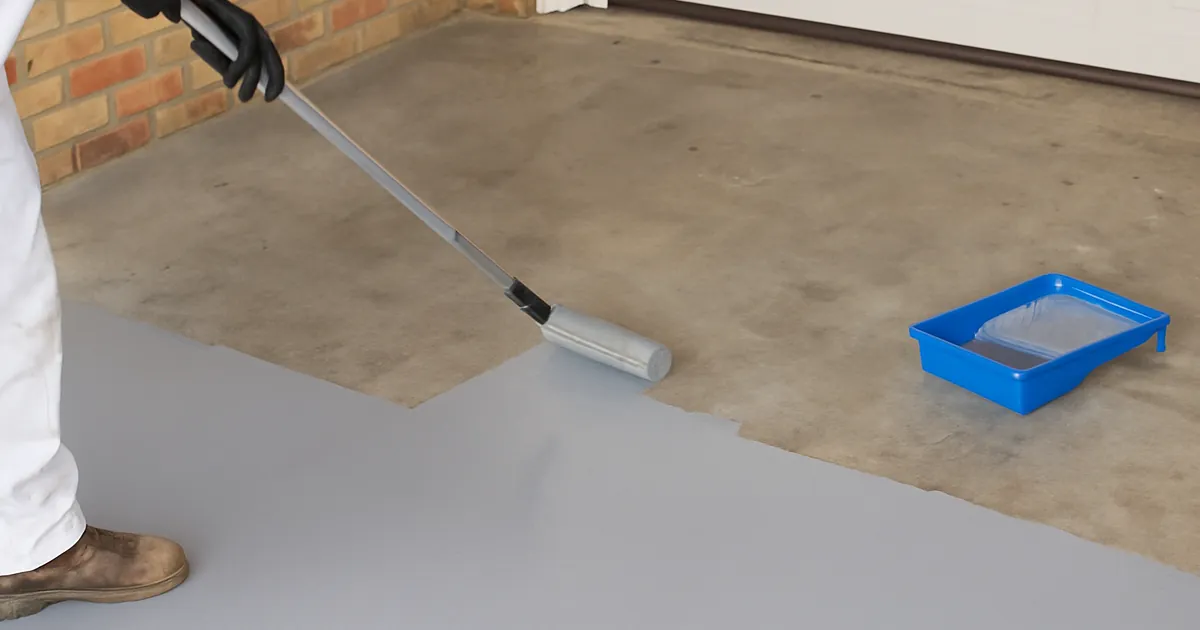
6. Main Coating Application
- Mix the two components thoroughly (resin + hardener), observing pot life guidelines.
- Use a roller with extension, working in small sections (1–2 m width) to maintain wet edges.
- Optionally, for decorative flake systems or chips, broadcast flakes while the coating is still wet.
- For multi-coat systems, allow recommended recoat window (e.g., 12–24 hrs) before applying next layer.
7. Topcoat / Seal Coat (Optional but Recommended)
- If your main coating is susceptible to UV, apply a polyurethane (aliphatic) topcoat for UV stability.
- This also improves scratch resistance and gloss retention.
8. Cure Time & Return to Use
- Allow foot traffic per manufacturer (usually 24 hrs).
- For vehicle load, wait 5–7 days (or as per product).
- For heavy loads / full cure, allow full cure time (e.g. 14 days).
Common Mistakes & How to Avoid Them

- Skipping proper preparation — most failures result from poor cleaning or bonding.
- Painting in cold, moist conditions — cold temperature slows cure; humidity may cause blisters.
- Over-thinning or under-mixing the product — this weakens the coating.
- Broadcasting flakes too early or too thickly — leads to uneven finish.
- No topcoat on UV-exposed areas — discolouration and chalking may occur.
Many “garage floor paint guides” gloss over these pitfalls (for example, they skip ambient conditions or dew point issues).
Maintenance & Longevity Tips
- Sweep or vacuum regularly to prevent grit from scratching the surface.
- Wipe oil/chemical spills immediately.
- Use a pH-neutral cleaner (avoid acid / harsh detergents).
- Reapply topcoat every 5–10 years (depending on wear).
- In high-traffic zones, use heavy-duty mats or drop zones.
Where DIY Ends and Professionals Begin
Painting your garage floor can be a satisfying DIY project, especially for small areas or hobby garages. But when you want durability, warranty, and professional finish — especially for the main motor area — that’s when the scale tips toward hiring a specialist like AH Painting.
We provide:
- On-site moisture testing, profiling, and defect repair
- Certified epoxy / polyurethane systems, high-grade materials
- Warranty-backed workmanship
- Project management (so you don’t spend weekends chasing suppliers and curing windows)
Internal link suggestion: you can link to your residential painting services or a floor / coating services page where relevant e.g., check out our residential painting services in Melbourne.
FAQ: painting garage floor
How long does painted garage floor last?
With quality materials and proper application, a garage floor coating can last 10–20 years before needing a refresh. The topcoat and traffic levels affect longevity.
Can I paint over existing floor paint?
Yes — but only if the existing paint is well-bonded. You must clean, sand or etch to provide adhesion. If the old coating is peeling or delaminated, strip it first.
How long before I can drive on the floor?
Foot traffic is usually safe after 24 hours. For vehicles, wait 5–7 days (or follow the manufacturer’s cure schedule).
Do I need a UV-resistant topcoat?
If your garage floor is exposed to sunlight (through doors or windows), yes — a UV-stable topcoat (e.g., aliphatic polyurethane) will protect against yellowing and chalking.
Which coating should I choose: epoxy, polyurethane or polyaspartic?
It depends on your priorities: epoxies offer strong durability, polyurethanes offer UV stability, and polyaspartic/polyurea systems cure fast with premium performance. For all-around residential garages, a two-part epoxy base + aliphatic polyurethane topcoat is often ideal.
Conclusion
A beautifully finished garage floor isn’t just an upgrade — it’s an investment. When done correctly, painting garage floor brings long-term benefits: cleaner space, enhanced durability, and real curb appeal.
Let AH Painting bring that transformation to your garage — with professional-grade coatings, meticulous prep, and lasting results. Contact us now for a free, no-obligation quote on painting your garage floor and let us create a durable, showroom-quality finish you’ll love.